DC2 ITR REAR SWAY BAR INSTALL IN EK CIVIC
What you need:
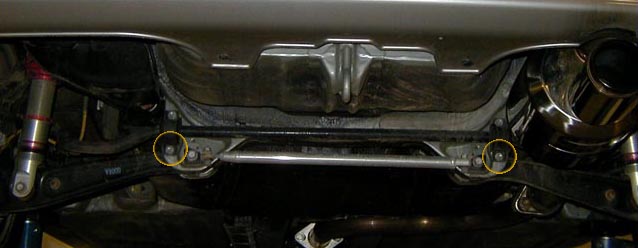
There are two holes on either end of the subframe. However the span of the holes on the D-bracket are farther apart than they are on the subframe. A new lower hole for the D-bracket must be drilled into the subframe. They are the holes circled in orange in the picture below.
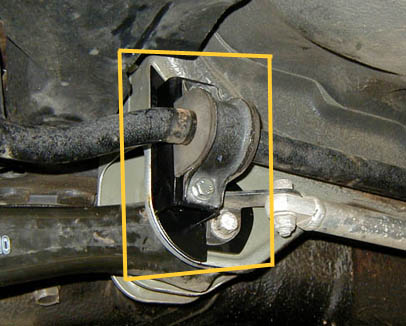
At first the endlink did not fit into the hole on the end of the end of the sway bar. The end of the sway bar has a large hole that contains a bushing which has a metal retainer within it. The metal retainer is the reason that the endlink will not fit through the hole. When the retainer is removed the endlink fits through. However the bolt is just long enough to reach the other side of the hole in the sway bar. It is possible to get the nut on using a lot of force. Air tools make it easier. I recommend putting a washer that is larger than the hole in the sway bar (not including the bushing contained within the hole) on before the nut. This is to prevent the endlink and bushing from ripping out of the sway bar. The bushings inside the holes of the sway bar are not necessary so do not worry about squishing or damaging them. The endlinks themselves contain the functioning bushings. The other end of the endlink goes through a hole in the lower control arm. The picture below is a picture of an endlink attached to the sway bar and lower control arm.
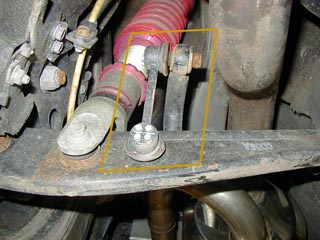
In the above picture it can be seen that the endlink is sitting at an angle rather than vertically. Eventually this stress can cause the d-brackets to rip the subframe of the car. I went to CDE Motorsports in Fairfax, VA to get some pieces made to position the endlinks the correct way. Below is a picture of the attachment for the d-brackets. Another solution is to purchase the Beak's kit (if it even still exists).